My blog is over five years old and despite enthusiastically adding joinery to the title, I have not once blogged about my woodworking projects.
Time to address that.
One of my neighbours had building work done a couple of years ago. Apart from the aggravation this caused, his workmen left a scaffolding board and another long piece of timber leaning against the back gate to my garden. They obviously intended that I should take possession of them, so one quiet evening I did. I kept them for ages on the grounds they’d come in handy one day.
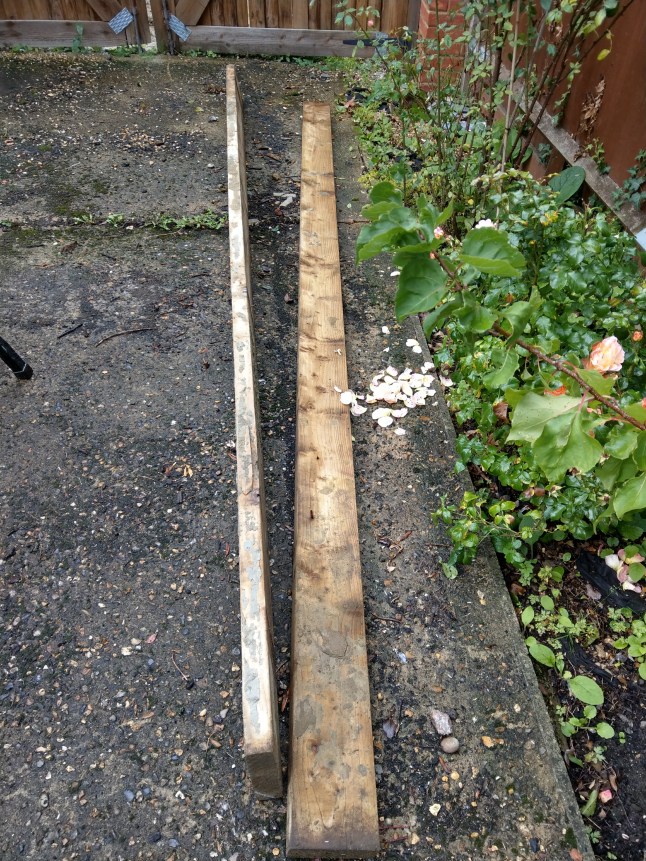
They were pretty nasty (the boards, not the workmen). Spiked with nails and head-worn screws, scabrous with lumps of mortar.
The idea arose when my cousin and his wife bought a new house. With a garden but without a garden seat. What better than an upcycled bench for them to sit on of a summer’s evening and watch the sun set on the brambles crowding over from them neighbour?
I set myself the constraint of working with the dimensions of what I had (this was a mistake, as you’ll see) and apart from new hardware only using the generously donated materials.
There was quite a lot of crap on the boards. Brute force dealt with the nails, but some of the screw heads and tips had to be ground off, which meant careful planning of where I made cuts later. A hammer and bolster did for the big lumps of mortar, but I did eventually resort to the belt sander to get all of it off.
I lifted the dimensions roughly from my own garden bench, mainly for the height of the bench and the back. The width was set by the board itself. I decided early on that I wanted the legs and arm rests to be one piece, mainly to minimise the number of joints and points of failure.
Be warned scaffold boards are dense. I cut by hand, with the jigsaw and with the two different blades on my old Black and Decker Scorpion. The board was just too unweildy for my table saw and of course that would be useless for even basic curves.
This was hard work. I suspect a modern variant of the Scorpion would be best and that my antique (about fifteen years old and well used) has just run out of puff and sharp blades.
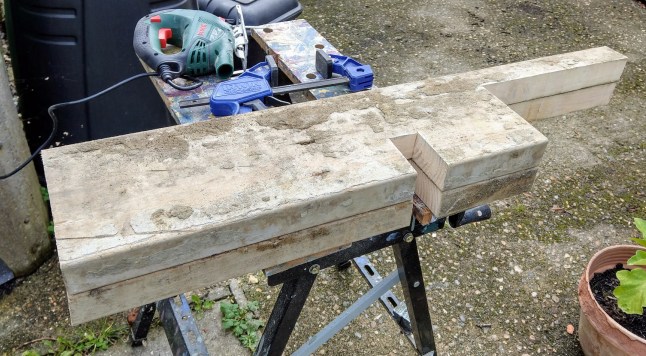
You’ll notice in the design I cut out a little arch in the legs. I wanted to get the weight down and this was a cute but simple way of doing it.
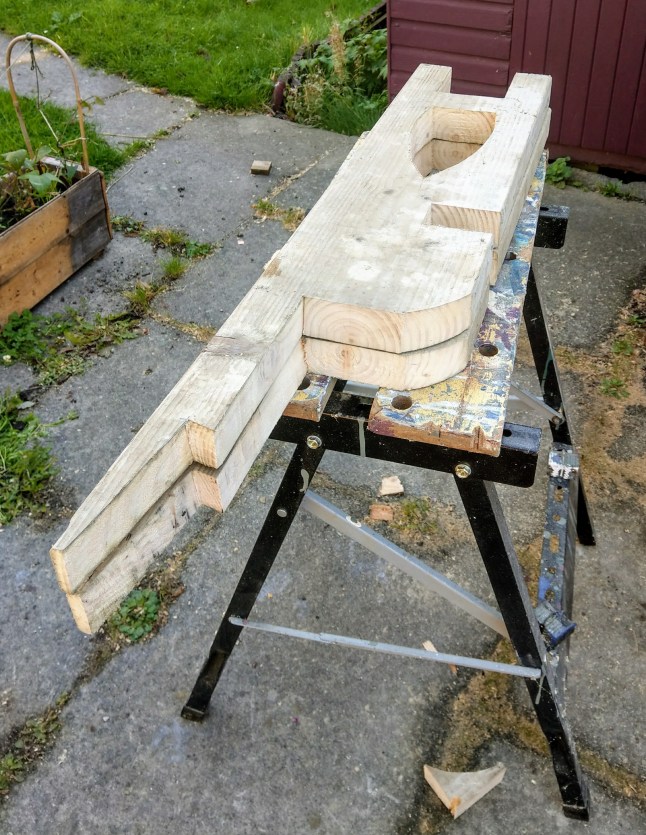
I joined the seat to the arms with offset half laps. I know these are considered quite weak, but with the thickness of the wood and the width of the board this gave me a really secure join. I backed it up with a couple of pocket screws as well.

The joints were a really tight fit, the mallet was not enough. In the end I had to get out the fencing hammer and use gentle persuasion. More hard work but the end result was worth it. The point of the offset (rather than going the half way through) was to allow the bench to sit a bit further forward, away from the back rest, otherwise you’d be sitting upright like on a church pew.

The overhang on the sides was deliberate. I had in mind a cup of tea at the end of a long day, so a place to rest it integrated into the bench seemed like a good idea. I also went over all the edges with a round over bit on the router for a neater finish. Apart from that I left most of the nail holes and damage unrepaired. Regular followers will know I am a storyteller and I wanted the material to tell its story.
Of course life intervened, I didn’t finish before the weather turned, so the project was stored outside covered in tarps through the winter. And that is where the glaring design flaw became apparent. The slightest gust of wind would blow the damned thing over. The heavy scaffold board made the centre of gravity quite high, and the relatively narrow width just didn’t provide enough stability.
I’d thought about this and put a couple of extensions on the legs, but it just wasn’t enough.

First job the next summer was to add more width to the base to keep the whole thing standing.
I coloured it golden oak, and there we have it, job done.
I’m not sure that my cousin has made much use of it, but Milo the cat loves it.


I would have liked to see the pictures but they do not display.
LikeLike
I have tried reloading the pictures, I hope it works now.
LikeLike
Yes, it works, except for the fourth and last photo.
LikeLike